Thanks to one too many experiences spending $100+ to print a conference poster and then dragging the damn thing across the country in a giant cardboard poster tube, I have been looking for an alternative to the traditional paper conference poster.
Over the past year or so, fabric conference posters kept popping up on my radar. I loved the idea of a poster I could fold up and toss into my suitcase, but it seemed like many of the companies offering fabric posters were charging just as much (or more!) than they do for paper posters.
However, this blog post from AstroBetter introduced me to Spoonflower and inspired me to take the leap for this year's SAA poster. The great thing about Spoonflower is that they don't specialize in conference posters- they specialize in custom fabric in general, which keeps the cost down.
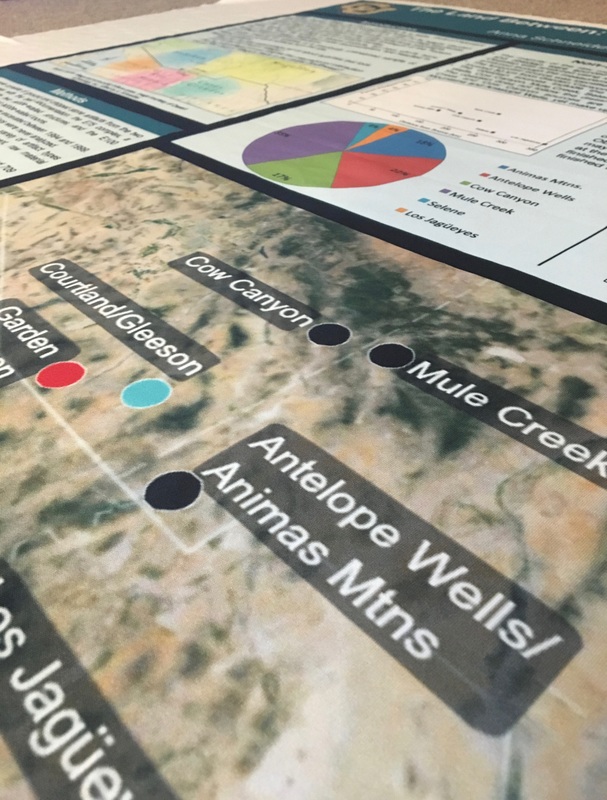
I was a little intimidated by the process of creating custom fabric at first, but it actually wasn't too complicated. I made my poster in PowerPoint, and my dimensions were 36" by 48". I then saved the finished product as a PDF, converted it to a 300 dpi JPG, and uploaded it to Spoonflower. Spoonflower has detailed instructions here. Once I uploaded my file, I used Spoonflower's user-friendly interface (pictured) to set up my custom fabric. It took a little fiddling, but I was eventually able to get my poster how I wanted it. I chose to use the Performance Knit fabric (which seems to be universally recommended for conference posters). Conveniently, 1 yard of fabric is perfectly poster-size with a little bit left over at either end.
Over the past year or so, fabric conference posters kept popping up on my radar. I loved the idea of a poster I could fold up and toss into my suitcase, but it seemed like many of the companies offering fabric posters were charging just as much (or more!) than they do for paper posters.
However, this blog post from AstroBetter introduced me to Spoonflower and inspired me to take the leap for this year's SAA poster. The great thing about Spoonflower is that they don't specialize in conference posters- they specialize in custom fabric in general, which keeps the cost down.
I was a little intimidated by the process of creating custom fabric at first, but it actually wasn't too complicated. I made my poster in PowerPoint, and my dimensions were 36" by 48". I then saved the finished product as a PDF, converted it to a 300 dpi JPG, and uploaded it to Spoonflower. Spoonflower has detailed instructions here. Once I uploaded my file, I used Spoonflower's user-friendly interface (pictured) to set up my custom fabric. It took a little fiddling, but I was eventually able to get my poster how I wanted it. I chose to use the Performance Knit fabric (which seems to be universally recommended for conference posters). Conveniently, 1 yard of fabric is perfectly poster-size with a little bit left over at either end.
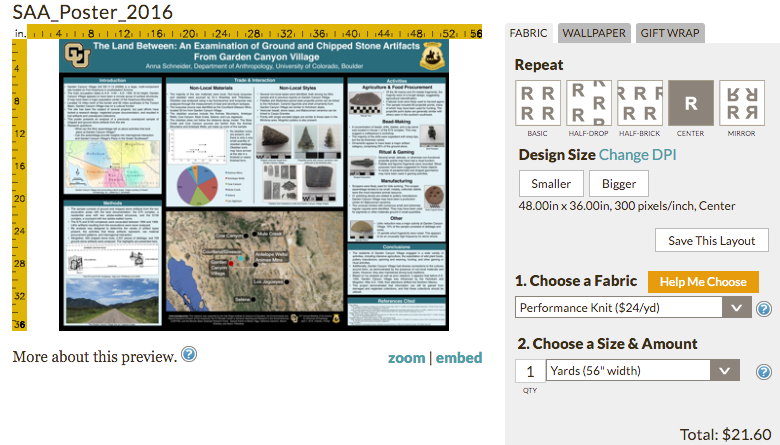
The best part? Check out that price tag! Only $21.60 for a yard of custom fabric! They had a number of shipping options and I chose to do rush shipping, which brought my total to $36.60- still less than half of what I paid for my paper poster last year.
I was blown away by the price. I was even more blown when my poster arrived 5 days earlier than its estimated delivery date. So, in terms of usability, value, and customer service, Spoonflower was a giant win.
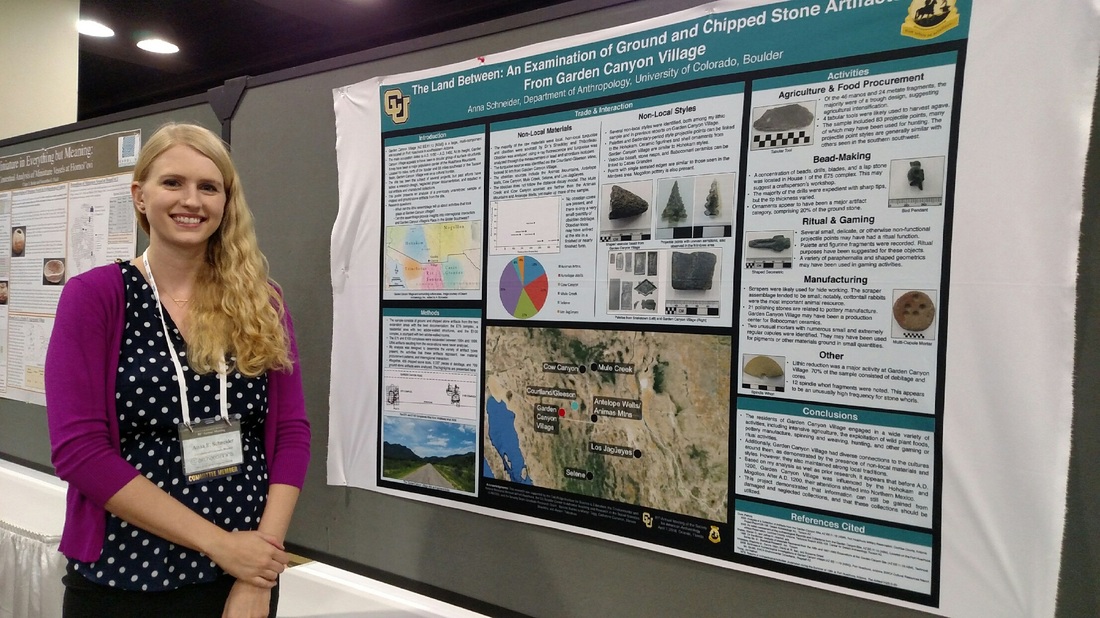
Now, on to the poster itself!
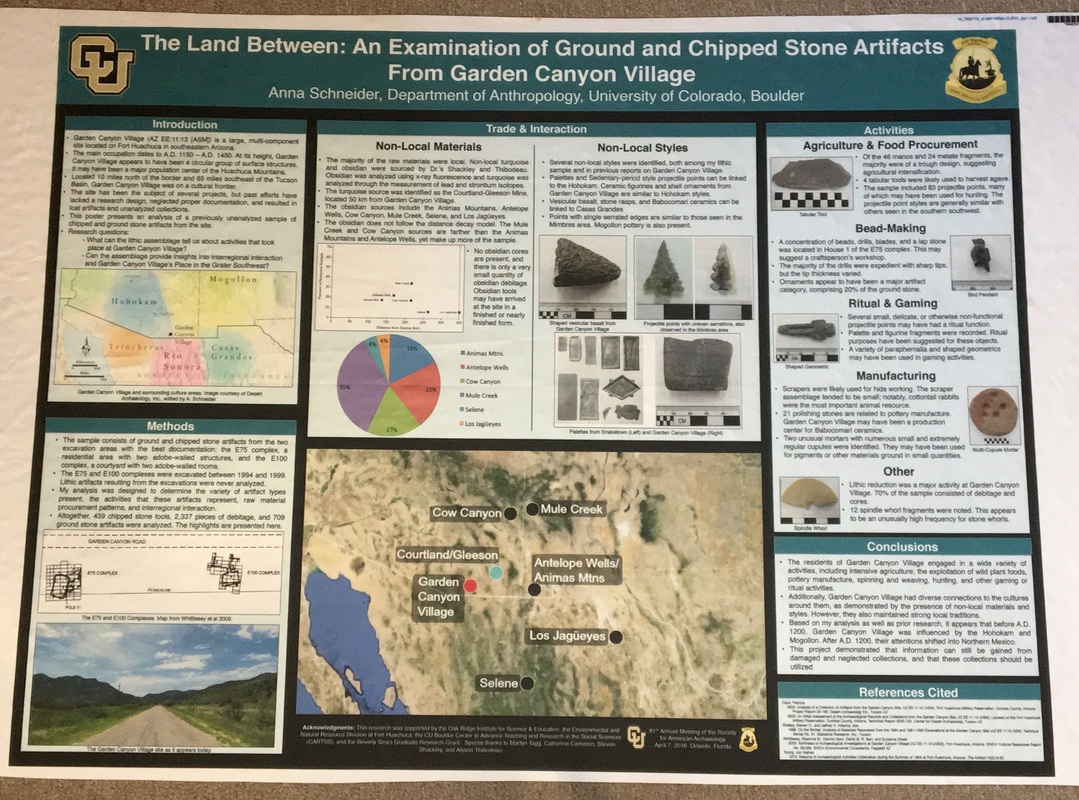
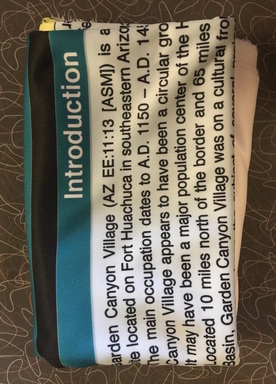
Unfortunately, my super luxurious teeny tiny grad student studio apartment does not have a continuous wall big enough for me to pin it up, so a floor shot will have to do for now. Overall, I think it turned out great. The colors are rich, the text is clear, and the fabric is nice and wrinkle free. The pictures definitely aren't as high resolution as they would be on a paper poster, but they still look nice.
As you can see, there is a border of unprinted fabric on all sides. I may just fold it back during my poster session, or perhaps leave a tiny bit out and pin it in the unprinted portion.
The fabric folded easily and I was able to fit the whole thing into a quart-size ziploc baggie so that it will stay safe and clean on my way to Orlando.
Of course, it remains to be seen if the poster remains wrinkle free after hours in a suitcase and how the fabric will deal with being tacked up during my poster session. I will update this post after the SAA's and let you all know how it goes, and also add a few more pictures.
I was blown away by the price. I was even more blown when my poster arrived 5 days earlier than its estimated delivery date. So, in terms of usability, value, and customer service, Spoonflower was a giant win.
Now, on to the poster itself!
Unfortunately, my super luxurious teeny tiny grad student studio apartment does not have a continuous wall big enough for me to pin it up, so a floor shot will have to do for now. Overall, I think it turned out great. The colors are rich, the text is clear, and the fabric is nice and wrinkle free. The pictures definitely aren't as high resolution as they would be on a paper poster, but they still look nice.
As you can see, there is a border of unprinted fabric on all sides. I may just fold it back during my poster session, or perhaps leave a tiny bit out and pin it in the unprinted portion.
The fabric folded easily and I was able to fit the whole thing into a quart-size ziploc baggie so that it will stay safe and clean on my way to Orlando.
Of course, it remains to be seen if the poster remains wrinkle free after hours in a suitcase and how the fabric will deal with being tacked up during my poster session. I will update this post after the SAA's and let you all know how it goes, and also add a few more pictures.
 |  |
Overall, I am really happy with my fabric poster! But, most of all, I am super excited to never have to try to fit a 5 foot long cardboard poster tube into the overhead luggage bin of a crowded flight ever again.
Hope to see you all in Orlando =) I'll be in the "From Crops to Stones" poster session on Thursday. It runs from 2 to 4 in Atlantic Hall B if anyone wants to come check out my fabric poster in person!
Hope to see you all in Orlando =) I'll be in the "From Crops to Stones" poster session on Thursday. It runs from 2 to 4 in Atlantic Hall B if anyone wants to come check out my fabric poster in person!
*Post SAAs Update:
Well, the conference is over, and I am still just as happy with my fabric poster! Here are a few thoughts after having put it to the test during my poster session:
Well, the conference is over, and I am still just as happy with my fabric poster! Here are a few thoughts after having put it to the test during my poster session:
- The poster traveled well- there were only a few minor wrinkles after a full day in my suitcase. I draped it over the couch in the hotel room for a few hours and that helped release them.
- The fabric is slightly stretchy, so pinning it up took a little extra maneuvering to make sure that there was no distortion.
- Thumb tacks worked just fine for pinning it up. I was a bit worried that the fabric would sag a lot at the top, or that the tacks would cause a lot of damage, but I had no issues.
- Next time, I might attempt to cut off the extra white fabric around the edges. I had planned on folding it back when I pinned it up, but that turned out to be a bit more work than I was able to do in the few minutes before my session began.
- The poster attracted a lot of attention. I had a feeling I'd spend more time talking about the fabric poster than my actual research, and that was definitely the case. People were extremely excited about the idea, which was fun! I wouldn't be surprised if there are a lot more fabric posters next year now that more people have been introduced to the concept (Hey, Spoonflower, wheres my sponsorship?)!
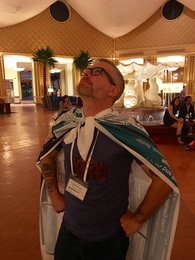
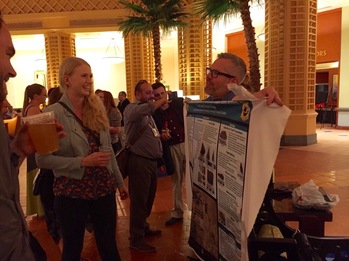
- It also made a great cape (modeled by the always fashionable John Lowe), and the ease of transporting it meant it got passed around the hotel lobby a bit (Thanks Mandy for the picture!). It was also fun carrying it around in my purse- there is no better response to "sorry I missed your poster session!" then pulling your poster out right then and there!
 |  |